Hey, welcome back to the BarnYard! An acre of land tucked away in the middle of Hollywood, where bulldogs roam free & imaginations come to life through the magic of special effects. We’ve created this blog so we can share our day-to-day creative chaos with you in a more real-time situation that our usual BTS video sites. But in typical BarnYard fashion, we will still be trying to load you up with as much “how to” information so you can make what ever we make at home.
Merry Christmas! Hope you are having a great day with family and friends! The last thing anybody wants to do today is surf the web, but somehow I have the feeling you will end up here anyway... So I put together a collection of some festive videos I worked on so you have an excuse to pull out the iPad during the family dinner!
In 2009, I was telling Felicia Day about an idea I had for a scene in a show I was developing, and that it might play well for the Guild. She thought it could be a stand alone bit, and I ran with the idea, morphing it into that year's Guild Christmas special. The XBox Live deal was in full effect, and the internet was abuzz with comments about Felicia and the Guild "selling out". So a line of insane merchandise was spawned...
I wrote, designed, and directed all seven videos. This series was shot at the BarnYard. Felicia and Kim Evey decorated the tree. Pretty much the best geek Christmas ever! The only thing that could top it is if R2 and 3PO were to drop by to decorate. Aw, who am I kidding! It can't get better than Codex and Kiko!
This is my driveway! All of the kids were from a play that America Young had just directed in the fall. America is does the voice over for this spot. And the hands at the end are Kim Evey's!
Kevin Thompson and I worked together on one of my first film projects, over 20 years ago! He has acted in countless shows since then for me, but my favorite credits of his are Return of the Jedi and Blade Runner!
Alley Bagget is PlayBoy's Lingerie Model of the Millennium!!! We did a comic book together, AlleyCat, in the late 90s. It was a pleasure to have her in this video.
I posted this one cause, well, er...wouldn't you!?!
One of my favorite props ever. I have copies of the Vork Unbreakable bank all over my house! You can see how I made it here.
I thought it would be even funnier as "sell-out" videos if there were lots of cameos. I asked my buddy James Kyson Lee if he would stop by to get filmed. He asked. "Can I drive your Delorean!?!"
This is my favorite of the series. Amy Okuda was such a good sport. This was also the only video NOT shot at the BarnYard. We filmed at my favorite hobby store, Kit Kraft. David Blue and Brea Grant were hilarious. And pay close attention to the line waiting to buy life-sized Tink dolls. As always, Kenny is first in line! And Guild director Sean Becker scopes out the competition.
I had the idea for this Clara cookie jar that also had a keg tap, but it was Sean Becker who dubbed it the "Mommy and Me" cookie jar! Yellow SPD Power RangerMonica May dropped in to play the hot mom. She also is a crazy talented make-up artist. She stuck around all day to do everyone's make-up and hair, including Amy's prosthetic elf ears!
Everyone says this is the funniest video.
Although Sean was traumatized by the beheading of the bear!
Also shot in my driveway, all of the snow is fake! Alex Albrecht killed it as the dad. this was the first time we worked together, but we did some amazing projects together over the next few years...
My friends America and Teal Sherer made this video for Christmas this year. I put together the prop weapons for them. Nothing brings holiday cheer like women battling with lightsabers!
And we end with the Zombie Apocalypse! I only helped peripherally on this one, loaning some props and printing some graphics. But I want you to see it because Sean Becker directed this perfect Team Unicorn video, and anything Milynn Sarley, Clare Grant, Michelle Boyd, and Rileah Vanderbilt do is golden!
If you follow me on Twitter (if not, please follow me on Twitter! @gregaronowitz! Thnx!) you may have noticed a barrage of tweets about Floppets. Your first thought was probably "Why is he cluttering my timeline with toy endorsements!?!?!" I apologize, I usually refrain from multiple plugs, but I'm going to explain why I did it this time within this blog. Hopefully I will also answer the question that was most likely your second thought, "What IS a Floppet!?!"
Photo 1: A FLOPPET is a collectible, wearable "pet". Each character is a small PVC shape with a patented post on the back, which hooks into a velcro tether. The tether can wrap around anything you can think to attach it to!
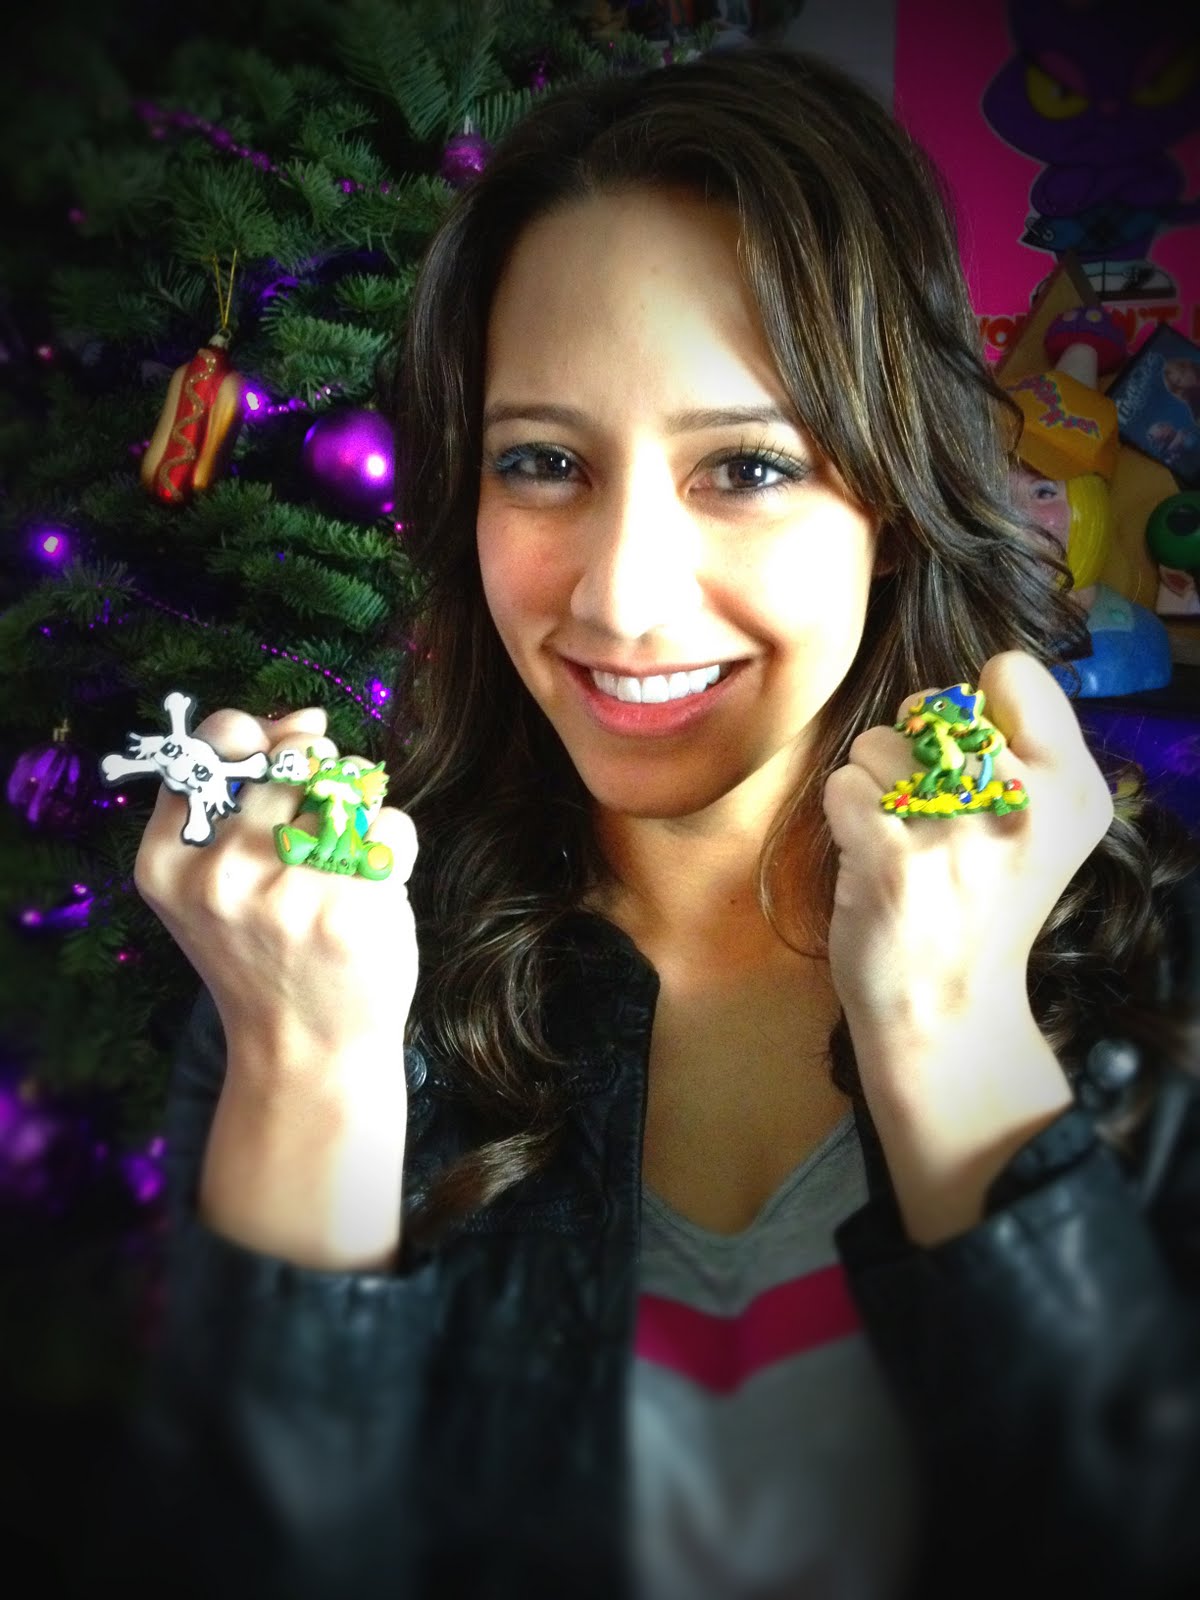
Photo 2: Originally conceived by Ilyse Brainin, a teacher well known for her work with reading impaired children, Floppets were intended for kids to use as decoration on their flip-flops at the beach. Once they ended up in children's hands, it didn't take long to find tons of other uses for them: rings, hair-ties, pencil toppers, locker markers, book bag tags, and as you see here, I am using them as holiday ornaments! Obviously, any adult with the collecting bug will love them, too.
Photo 3: Why am I promoting them so much? Ilyse has been a friend of mine for a long time, and we have worked together on multiple amazing projects. She took her inspiration for Floptopia and the Petlets and formed the Zydeco company with another great friend, Rich Goodman. He handles all of the operations, and keeps the company functioning! They asked me to partner with them on this new adventure, and help create characters and concepts that would take the company in new directions. The second I saw what they were doing, I knew I had to be involved.
Photo 4: I think all the designs are amazing, but I particularly love using the skunk to tie my power cable, and ward would-be borrowers away...
Photo 5: No matter how many project companies I start, I always forget how much work goes into them. It's not a bad thing, it's actually my favorite part. It is really just A LOT of work. Once the physical Floppets were done, they needed tags. An outside needed to be designed...
Photo 6: And then an inside! There are so many details to keep the product functional. If Rich never has to see another barcode again, he would be thrilled. Unfortunately, that will not be the case, as there are going to be hundreds, if not THOUSANDS, more Floppets to come!
Photo 7: The response to the original Floppet designs was overwhelming, and I felt there was a huge potential for the brand to grow even larger. I wanted to move the company into licensed properties, but my partners agreed that we also wanted to keep the company "grass-roots" for a while longer, so we could have a stronger grasp on operating the business before branching out too far.
I thought a good test would be to make some characters from some of my other projects, so we could show other franchise owners what the product could do, while still keeping it close to home. We started with one of my favorites, Labou.
Photo 8: We were all very happy with the end results. This mythical creature seems to make everyone smile, including other mythical creatures such as Team Unicorn's Milynn Sarley!
Photo 9: The trick with designing marketing support for licensing is finding the balance between promoting the Floppets brand, and featuring the franchise. Labou allowed me to test options without upsetting the licensed property owner. You know, cause, that's me!
Above is the layout for the Labou Floppets double sided tag. The blue lines are guides for the die-cutting, and aren't printed on the final tag. Lesson learned here: Any art between the tether scores will be covered by the product. PoorMarissa Cuevas!
Photo 10: Taking another step forward, Floppets is thrilled to announce series one of The Guild collection!
Photo 11: I introduced Felicia Day to Rich while we where at Wizard World in Chicago, and he gave her a kitten Floppet. Of course, she loved it! A collaboration seemed obvious, and I started laying out the plan straight away. It is so exciting to have Codex, Vork, Zaboo, Tink, Clara, and Bladezz join our line-up.
Photo 12: All of our Guild Floppets are personally approved by the actors...
Photo 13: Their pets...
Photo 14: And their director! Guild helmer Sean Becker models the choker version...
Photo 15: The main challenge The Guild offered was the level of detail that needed to be achieved. This series has really helped set the bar as far as the quality you will get with the Floppets brand. Series one is based on the animated avatars from the show's opening titles, and I really didn't want to do it unless we could recreate the look exactly. It took a little bit of work, but I am very happy with the end result. I hope you are, too!
Photo 16: The art of PVC inlay is not new, but it is the level of detail we are pushing to achieve that makes our product special. Especially since most Floppets are no bigger than 1 1/2 inches! Above is an example of an average mass produced PVC inlay product.
Photo 17: When you buy a PVC key chain or charm, they are made by hand layering liquid plastic into metal gang molds. The shapes are usually broad and simple, to help speed up production. This is an example of a typical character mold.
Photo 18: Here is one of our molds for the Zaboo Floppet. You can see the elevated amount of detail. All of those lines will be hand painted in the various colors...
Photo 19: Then the rest of the cavity is filled solid with the main color. The material dries, the individual pieces are pulled and trimmed, and then the post is adhered to the back with a special glue that makes it almost impossible to remove!
Photo 20: The Codex Floppets in process. This is why I love doing projects like this. I love making stuff, and I love seeing stuff I've made being duplicated so everyone can have some! The production process is as fascinating to me as the actual act of designing the original.
Photo 21: The finished Codex. There were several versions of Codex in the design stage. I originally thought she might have more of a presence with a black outline, but filling her with solid black dulled down the other colors. Ultimately, we went with a white border, which helps give her a unique identity when lined up with the rest of the gang.
Photo 22: And... more tags! We got all the Guild Floppets shipped in time for the holidays, but the tags were delayed. In order to make sure that fans could get them in time, I hand cut a bunch of tags to keep the orders flowing. I don't know, would that be considered a collectible variant!?!
Hopefully that answered some questions about Floppets. I am really excited about this new project. I love my partners and I adore what we are creating. Check back here often, as I will blog about all of the new exciting products we are going to be adding to the line. We have so many amazing things to announce in 2012, it's hard not to blurt it all out right now! Leave a comment below if there is anything you would like to see as a Floppet, and go to Floppets.com to buy some! Thanks!
At long last we come to the final blog for Dragon Age: Redemption. If you've been following along, you've seen the magnitude of the project we set out to do, and the uphill battle we fought along the way to do it! The BarnYard took on the lion's share of the visual aspects of prepping the film, including the sets, props, and make-up effects. Any one of those departments should have had the budget of the entire project, and my crew should have been 10 times the size. but it wasn't, and the people involved worked that much harder to make everything amazing. You may wonder how many unseen dozens of craftsman helped in bringing the DA:R art department's task to fruition, but the truth is everyone involved has been mentioned and/or pictured in these blogs. We were a rag tag team of believers in what Felicia Day had planned, and despite the odds that were against us, I think things turned out pretty well.
Every episode has it's own behind the scenes story, and I hope I covered most of them on these pages. The final episode brought us to a place of magic and mayhem, Sundermount, the ancient burial shrine of Elves.
Photo 1: When we last left Sundermount, it was being ravaged by the incredible winds ripping through the mountains above the San Fernando Valley. I got a crew up there as early as possible in the morning so we could get the set back together and in perfect shape before filming began.
Photo 2: We were going to be on the location for several more days, so the trick was not only to get the set standing again, but to make sure it stayed that way for the rest of filming! We quadrupled the number of stakes, sandbags, and ropes we used to secure the walls down on the backside, and we fortified them with jack stands on the front side when the set wasn't being filmed.
Photo 3: Sundermount stands again! Very little of the set can actually be seen in the show, which is disappointing, since I think it is the only real setting that directly connects our world to Bioware's virtual world.
Photo 4: The Sundermount shoot spanned over a few "splits". This is when the 10 to 12 hour work day is pushed later in the day, or way early in the morning, to split the time between the dark of night and the light of day. We needed daylight for the travel shots to Sundermount, and for the morning after the main battle. Of course, that battle all took place in the dead of night.
There was a lot to shoot, so even though most of episode 6 all took place in one location, it was heavy divided up over those several nights. Many things needed to be reset, including the blood ritual. Here, the maze of runes is being redressed for a second night of sacrifice!
Photo 5: Moviestar drinking Rockstar! (I gave Marissa Cuevas the nickname "Moviestar" on Labou, our first project together, a long, long time ago! Her birthday is this week, so send her well wishes!) The hardest part about working splits or night shoots is staying awake! No matter how many nights of a shoot I work, I never seem to fully adjust and find myself still waking up during the day to do stuff, which makes it more difficult to jump into a 12 hour work shift. Marissa had a very emotional scene during the Sundermount night shoots, so energy drinks became her best friend. Felicia and Kim gave their love to the crew in the form of a coffee truck, which kept us warm and awake on those long. cold nights!
Photo 6: One thing Marissa learned is that it is hard to keep warm when you are spending long hours playing dead! The saddest part of Dragon Age: Redemption for me was the fact that Marissa's character, Fina, dies in the end. (Sorry if that was a spoiler!!! But I hope everyone has seen DA:R by now!!!) The only bright side was that I got to participate in the dramatic scene by crafting the jawbone sacrificial dagger that does the deed. I know I showed this to you before, but I couldn't reveal all the versions of it to avoid the above mentioned spoiler!
Here is the final hero dagger, the bloody stunt dagger, and the half dagger rig that attached to a harness under Marissa's costume for the initial stabbing.
Photo 7: In the make-up trailer, make up artist John Wrightson begins Doug Jones'stransformation into the corrupt mageSaarebas.
Photo 8: Originally, I planned on sculpting hand appliances for Doug, but his movement and physique are so perfect already, a paint job and some custom-made creepy finger nails were all that was necessary. This helped out the budget immensely, as hand appliances would have needed to be remade for every day of filming and added expense to our already taxed budget!
Photo 9: Our first round of zombies didn't get shot due to time restrictions, so I hobbled together a few more for the next night of shooting.
Photo 10: We have a saying around the BarnYard make-up effects shop that has never been proven wrong, and it goes a little something like this: "It takes a while to apply our creature make-up, but when we're done, it's time for lunch!" No matter how much we try to work with the A.D. department, it is inevitable that they will schedule the lead creature actor to have his make-up applied BEFORE lunch, and then go on to set with a monster face covered in spaghetti or pizza grease. Luckily, Doug is the consummate professional, and has mastered the art of preserving his rubber face no matter how restrictive it is. Unfortunately, the finger nails prevented him from enjoying the corn on the cob!
Photo 11: After lunch, I did a quick retouching, and Saarebas was good to go. Looking at this shot mostly makes me think of how awesome the costumes were that Shawna Trpcic put together.
Photo 12: The same winds that plagued the Sundermount set wreaked havoc on the cast and crew during filming. FX make-up supervisor Erika Ladd had to keep Saarebas's hair tied up between takes to prevent the wind from destroying the wig. Note Marissa playing dead in the background, bundled up for rehearsals.
Photo 13: No one had it so bad on those nights as Felicia herself. When I was designing the Tallis costume, many key words floated around in my head: Sexy, Strong, Functional, Authentic, Organic, and did I mention Sexy!?! Words like "Warm" and "Cozy" never really made the cut. You will never feel so wimpy as when you are standing on a mountaintop in mid January, wearing multiple layers of Down, electric thermal gloves, scarves, wool face mask and fur lined hat, and complaining about the cold as the star/writer/producer stands next to you in skin tight leather pants and revealing corset of your purposeful design.
But Felicia is a trooper, and wardrobe had giant warm coats to bundle her up in between takes. Once the scene got going, Tallis was very active, and Felicia channeled her struggle against the cold into fierce assassin energy.
Photo 14: The Sundermount battle climaxes with Tallis making the choice to execute Saarebas (Again, sorry if that's a spoiler. But really? C'mon!!!) In the original script, Tallis delivers a final blow that severs the Qunarimage's head from his shoulders. In the last scene, as the remaining heroes bury their dead, Talliswalks off toward the horizon carrying the head as her prize.
Ultimately, it was decided in the final version of the show that keeping the head was out of character for Tallis, and the imagery changed the message Felicia wanted for the message of the show. Although I completely agree with the way the finale plays out, I was bummed that one of my favorite DA:R props found it's final resting place on the cutting room floor.
None the less, I made it, and here's how! I did a fiberglass cast of the cowl and horns from the silicone matrix mold used to create the make-up, as seen above.
Photo 15: Then I did a 1630 urethane cast of the face appliance, backed with fiberglass. Because the action in the script was very specific, and the head would only ever be seen held by the hair as a trophy, I decided to create it as a rigid version from the original molds. Ordinarily, if it needed to roll or be held by the face, or move in any way, we would have made a foam or soft silicone version. However, this would require additional molds, an underskull, possibly simple mechanics. Doing it as a rigid "looks only" prop saved us days of work and thousands of dollars.
Photo 16: I wanted to add a "dead" expression to the head, as apposed to the neutral look on Doug's lifecast, so I dremeled off the lower lip and chin, and removed the closed eyes. I glued in some glass eyes that were pretty close to Doug's color, then used Magic Sculpt 2 part epoxy resin to sculpt in the eyelids. I tried to make them look relaxed and asymmetrical, since the muscles would have loosened up after death.
Photo 17: Next, I fused the face to the cowl. I glued the lower jaw back on, but repositioned it so it was a little slack, and slightly twisted to one side. I used more Magic Sculpt to bridge the spaces created by the cuts, and rebuilt the lower lip to sag from it's own weight. Then I added castings of the secondary horns. I was also careful to not secure the top of the forehead, so the wig could be tucked under after the head was painted.
I used the hole in the bottom of the neck to put a set of teeth in, since the open lips revealed them. I believe those are a spare casting of Ben Affleck's teeth that were laying around! Once those were set, I capped the severed neck off with a circle of sintra plastic, then smeared some Bondo over it roughly to simulate meaty, sinewy bits!
Photo 18: This is the head after I finished painting it. I matched the paint scheme I did on the hero appliances, but added more purple veins along the wound, the jawline, and eye sockets, to represent settled, clotted blood.
Photo 19: This is the head after it was splattered with blood on set. I also did a light spray of Krylon Crystal Clear to give the skin a dewy sheen.
Photo 20: Because you can't blog about a severed head and not make the joke...WHAT"S IN THE BOX!?!?! (If the reference is lost on you, click here) The sad truth is, the head IS boxed up now, waiting for a future open space on my display shelf. As for Tallis's trophy, it was digitally removed from the final show.
Photo 21: There were many moving parts to the series finale, and the restrictive time schedule put more things at risk of ending up on the chopping block than just my prop head. There were several key moments that main unit just couldn't fit into the schedule, so Felicia called The Guild director Sean Becker to step in and helm 2nd unit.
Sean was in charge of capturing all of the insert shots and pick-up shots from various scenes that would help stitch the sequences together seamlessly. Most of this was done towards the end of the schedule, when we were back on the stage, so my team needed to recreate small chunks of the various locations in corners of our warehouse.
Photo 22: The Guild's director of photography, Chris Darnell, joined Sean to film each shot. We all studied the footage together to make sure that the right environment was created, and Chris very carefully recreated John Bartley's lighting. Inserts and pick-up shots are more difficult than they look, as you are trying to match another team's footage exactly while being in a completely different place, with completely different resources.
Here, Chris lines up an over the shoulder close up of the mask of Fen'Heral as Saarebas prepares it for the ceremony.
Photo 23: The mask and dagger await their close-up insert shots by 2nd unit.
Photo 24: The biggest challenge for the 2nd unit art team was piecing together environments for the fight scenes. We needed pick-ups for both the cave fight and the Sundermount fight, which were both heavily location dependent sets. Here, Chris rigged a large backdrop out of a black fabric called Duvetyne to simulate the night sky above Nyree as she deals her death blow.
Photo 25: Lune is at the receiving end of that rock! Pooja and Red 5 helped Sean and Chris painstakingly recreate a small section of the Topanga mountains in order to complete this scene. I think that grass is from my lawn!
Photo 26: When filming was done, we spent the next week striking the sets and wrapping out the show. I tried to hang on to as much as possible for use in future projects, but there really was just too much! We ended up filling three 40 yard dumpsters with set walls and broken props. It's always a little heart breaking to work on something so hard for so long, and see it end up in a trash pile. Here, the remains of Sundermount await their fate.
But don't be too dismayed! I made sure all of the hero props, weapons, and set dressing was carefully packed away. And there was a lot of it! Imagine the final shot in Raiders of the Lost Ark, that giant warehouse of wooden crates containing all the known secrets of the universe. Just know that there is a version of that storing everything you love from Dragon Age: Redemption, The Guild, Legend of Neil, Labou, Babylon 5, Speilberg's AI, Lost World, and everything else I ever worked on, just waiting for a reason to be put on public display.
Photo 27: All of those things will not be forgotten, much as DA:R will not be forgotten even though the series has come to an end. Tallis vanished over the horizon, but everything that Felicia accomplished by bringing Dragon Age to life has paved the way for so many more adventures to come. Hopefully some of them will be yours! I know I would love to see them.
And the genius of digital media is that the entertainment doesn't need to end when the show is over. I'm certain this is not my last blog ever about DA:R, as I remember new stories every day about the journey we had to create it. Felicia has also created an episode by episode commentary so you can get more of her insight on the making of the show.
So, for now, that has been my experience on the making of Dragon Age: Redemption. I hope you have enjoyed my public logging of the memories! It was an amazing project to work on, and I must thank Felicia for involving me, and especially for letting me take on so much of the responsibility, even when everyone else thought I was crazy for wanting to do so. Everyone else except Kim Evey, who I am eternily greatful for, as she suported my artistic insanity to the very end. Huge thanks to BioWare for letting me play so freely in their abundant and detailed world. I also need to thank my tireless crew again for their undying dedication during the endless hours and often unbarable weather! I hope this blog allowed you to know more about them and their incredible talents, without which the show could never have been made.
And I want to thank you for reading this. The response to my blog has been overwhelming, and honestly, surprising to me, and I am honored that so many are interested in what I do. It means the world to me that I get to ineract with you about the work done at the BarnYard, and your comments and sharing have really insired me to do more. Thanks again!
With Dragon Age:Redemption complete, it's time to move on to other things. But now that you have seen EVERYTHING, definitely let me know what your favorite set, prop, make-up, or any part of DA:R was! And I feel like I covered pretty much everything, but was there something I missed that you really wanted to know about? Leave a comment below and let me know. Oh, and don't forget about that DLC! As of right now, Talis is pretty much my favorite video came character ever. I think Felicia might agree...


